DIY Smart Mirror Projects: A Beginner's Guide
smart mirrors have emerged as a popular DIY project, blending technology and functionality with aesthetic appeal. A smart mirror can display useful information such as time, weather, news, and even personal reminders while serving as a regular mirror. This guide aims to introduce beginners to the world of DIY smart mirror projects, offering step-by-step instructions and essential tips to build your own smart mirror from scratch.

What is a Smart Mirror?
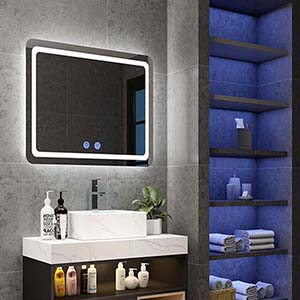
A smart mirror is essentially a two-way mirror with an embedded display behind it. When the display is turned off, the mirror functions like any regular mirror. When the display is on, it projects information through the mirror, allowing users to see both their reflection and the displayed data. The concept leverages simple yet powerful technology to transform everyday routines.
Required Materials
Before starting your DIY smart mirror project, gather the following materials:
1. Two-Way Mirror: The core component that enables the smart mirror functionality.
2. Monitor or Tablet: To serve as the display behind the mirror.
3. Frame: To hold the mirror and display together.
4. Raspberry Pi: A small, affordable computer that will power the smart mirror software.
5. Power Supply: Appropriate power sources for the Raspberry Pi and monitor.
6. Cables and Connectors: HDMI cables, power cords, and possibly adapters, depending on your hardware setup.
7. Glass Cleaner and Microfiber Cloth: To keep the mirror clean and streak-free.
Step-by-Step Guide
Step 1: Setting Up the Raspberry Pi
1. Install the Operating System: Download and install Raspbian on an SD card using software like Etcher. Insert the SD card into the Raspberry Pi and power it up.
2. Connect Peripherals: Connect a keyboard, mouse, and monitor to the Raspberry Pi for initial setup.
3. Network Configuration: Connect the Raspberry Pi to the internet via Wi-Fi or Ethernet.
Step 2: Installing Smart Mirror Software
1. MagicMirror²: The most popular smart mirror software is MagicMirror², an open-source modular platform. To install it, open the terminal on the Raspberry Pi and run:
2.
bash
3.
4.
复制代码
5.
6.
bash -c "$(curl -sL https://raw.githubusercontent.com/MichMich/MagicMirror/master/installers/raspberry.sh)"
7.
8.
9. Configuration: Customize the modules in the config.js file to display the desired information, such as calendar events, news feeds, weather forecasts, and more [1].
Step 3: Preparing the Mirror
1. Cutting the Mirror: If your two-way mirror needs resizing, carefully cut it to fit your frame using a glass cutter or have it professionally done.
2. Cleaning: Ensure the mirror is clean and free from any smudges or dust.
Step 4: Assembling the Frame
1. Frame Design: Build or purchase a frame that can house both the mirror and the display. It should have a snug fit to hold everything securely in place.
2. Mounting the Monitor: Attach the monitor to the back of the mirror, ensuring that the display area aligns with the reflective surface.
3. Cabling: Route all necessary cables through the frame for a clean look. This includes power cables and HDMI connections [4].
Step 5: Final Assembly
1. Place the Mirror: Insert the two-way mirror into the frame.
2. Secure the Display: Position the monitor behind the mirror, ensuring it’s centered and secure.
3. Connect the Raspberry Pi: Connect the Raspberry Pi to the monitor and power it on.
Step 6: Testing and Troubleshooting
1. Power On: Turn on the Raspberry Pi and monitor to test the setup.
2. Adjust Settings: Make any necessary adjustments to the display settings or software configuration to ensure everything displays correctly.
3. Troubleshoot: Address any issues such as misalignment, software glitches, or display problems.
Enhancements and Customizations
Once the basic smart mirror is functional, consider adding the following enhancements:
1. Voice Control: Integrate voice assistants like Amazon Alexa or Google Assistant for hands-free operation [6].
2. Touchscreen Capability: Add a touch overlay to make your mirror interactive.
3. Additional Sensors: Incorporate motion sensors to activate the display when someone is nearby.
4. Custom Frames: Design or purchase frames that match your home decor for a seamless look.
5. Advanced Modules: Explore additional MagicMirror² modules or develop custom ones to expand functionality [3].
Tips for Success
· Plan Thoroughly: Before starting, have a clear plan and all necessary materials on hand.
· Follow Safety Guidelines: When handling glass and electrical components, follow safety precautions to avoid injury.
· Start Simple: For your first project, keep the design simple. You can always add more features later.
· Utilize Online Resources: There are many online communities and resources available to help troubleshoot and enhance your project [5].
Conclusion
Building a DIY smart mirror is an exciting project that combines technology and creativity. It not only enhances your technical skills but also provides a functional and stylish addition to your home. By following this guide, beginners can confidently embark on their smart mirror journey, creating a personalized device that meets their unique needs and preferences.
 English
 Russian


